Mastering LLM Infrastructure with Otoroshi: A DevOps Guide to API Resilience
Learn how to set up Otoroshi to manage LLM APIs efficiently, implement fallbacks, and add semantic caching to build a resilient AI infrastructure.
29 mars 2025
Published
Hugo Mufraggi
Author

A DevOps Guide To API Resilience
TLDR: Otoroshi is an open-source API gateway that solves common LLM integration challenges for startups and enterprises. This step-by-step guide shows how to set up Otoroshi to centralize LLM API management, implement fallbacks between different providers, add semantic caching to reduce costs, and establish guardrails for security — all through a visual interface without coding. Perfect for teams looking to build resilient AI infrastructure while maintaining control over their token consumption.
This article is the first in a small series about Otoroshi. I am currently working on creating a SaaS platform for Invyo. The main goal of this SaaS is to facilitate users' LPS discovery. Like many startups, we use LLMs for data cleaning and enrichment tasks.
The simplest (but least efficient) way to implement this is to create a client for your LLM and duplicate your API key across multiple services. This would make token consumption reporting complicated, so it’s a no-go for me.
Moreover, given the global economic context and the U.S. government’s attitude toward Europe, we are not immune to potential increases in customs taxes on digital goods and services. Relying on a single LLM solution today would be a mistake and a lack of resilience.
This article will explain why I chose to deploy Otoroshi for Invyo and how it addresses the different issues mentioned above.
Brief Introduction to Otoroshi
What is it?
Otoroshi was originally an internal project at MAIF, created in 2017, before becoming open-source. The main developer behind it is Mathieu Ancelin.
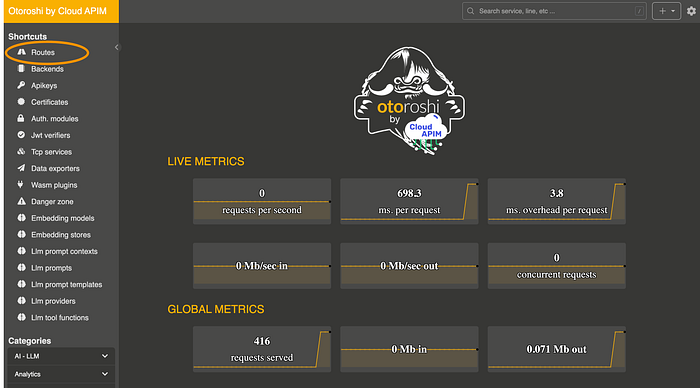
Otoroshi can be seen as a reverse proxy, acting as a gateway between external services and your system. In our case, we are in the second scenario: my different services will call Otoroshi, and Otoroshi will call the LLM service.
However, reducing Otoroshi to a simple API gateway is misleading — it’s much more than just an intermediary for LLMs and AI. That use case represents only 10% of the project’s capabilities. Otoroshi is a comprehensive and powerful solution.
How and Where to Run It
Otoroshi is an open-source project that you can self-host. You can find the documentation here. Depending on your team’s resources, you may delegate hosting to a specialized company. Here are two options (I am not affiliated with them):
- Clever Cloud: They offer a fully managed Otoroshi deployment for less than €40 per month.
- Cloud Apim: This is Mathieu Ancelin’s company, which provides various hosting and management options for Otoroshi.
AI and LLM Module
The AI module in Otoroshi allows you to structure your prompt engineering tasks efficiently by organizing them into reusable components — like Lego bricks. Here are some of the key features:
- Providers: Define which LLM service you use (OpenAI, Anthropic, Mistral, etc.). You can configure:
- API keys and model selection
- Fallback LLMs in case of downtime
- Semantic caching to reduce redundant API calls
- Pre- and post-guards, such as:
- Pre-checks to prevent sensitive data leaks
- Content moderation filters (e.g., blocking offensive language)
- Context: Define specific contexts for prompt engineering tasks and reuse them across different requests.
- Prompt Templates: Create modular, parameterized prompts to standardize LLM interactions.
Otoroshi is constantly evolving, thanks to Mathieu’s work. One of the latest additions is support for MCP (Model Context Protocol), which enhances multi-model interactions.
How It Works
Let’s see how to set up Otoroshi step by step:
- Define a Provider
- Create a Context
- Design a Prompt Template
- Set up a Route to connect them
Setting Up a Provider
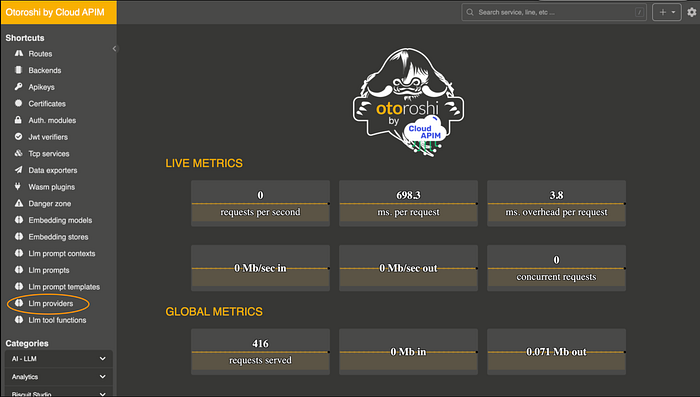
On Otoroshi’s home page, click on LLM providers to access your provider list. Then, click on add items.
You should now be on the provider configuration screen. Here, you can set up all details about your LLM provider and choose your model.

- Provider: Select your LLM provider from among 17 available options.
- API Connection: Configure the API URL, your API token, and the timeout.
- Connection options: Choose your model, along with parameters like N, Temperature, and Top P.
- Context settings: Set up a default context that will be added to your API call. For example: “Your AI specialized to do SOMETHING…”
- Provider fallback: Add a fallback provider in case the primary provider is down.
- Cache: Add semantic caching to reduce consumption for similar calls. You can specify the similarity percentage threshold.
- Guardrails validation: Add guards before and after the API call. For example, you can set up pre-guards to prevent sending secret variables and post-guards to check that responses don’t contain offensive content.
- Tester: Easily test your configuration.
Now you have successfully set up your first provider.
Setting Up a Prompt Context
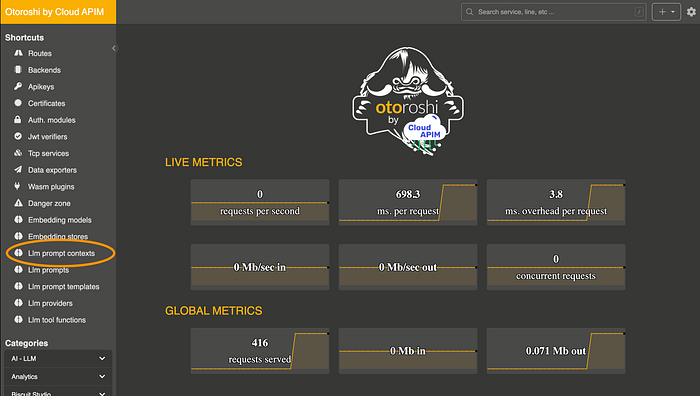
Next, click on prompt context and then click on add items.
On this page, you can set up a context for your future prompts. It’s straightforward: you can have a pre-message and/or a post-message context. For example, in the pre-context, you provide the overall context of the task, and in the post-context, you can add rules for formatting the output or other requirements.
You can test your context directly from here. Simply choose your provider and write your prompt.
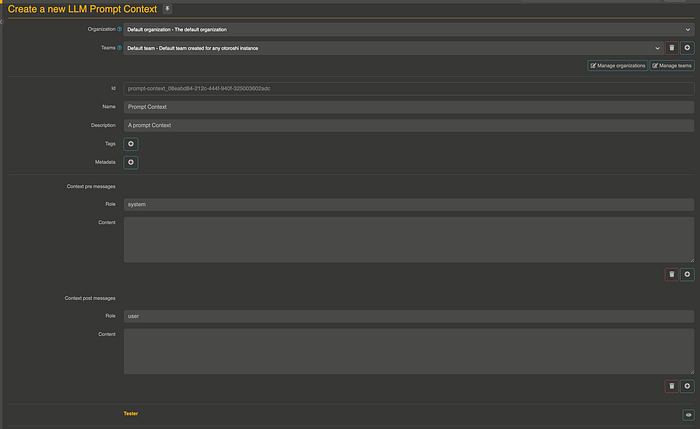
Now, you have successfully set up your first prompt context.
Setting Up a Prompt Template
Click on prompt templates and then click on add items.

You can define your prompt with multiple steps. Looking at the template, you’ll notice @{body.data}. When your prompt is sent to the provider, Otoroshi will replace this with the value from your request body. For example, I’ll send a body with {data: “invyo”} in my HTTP call.
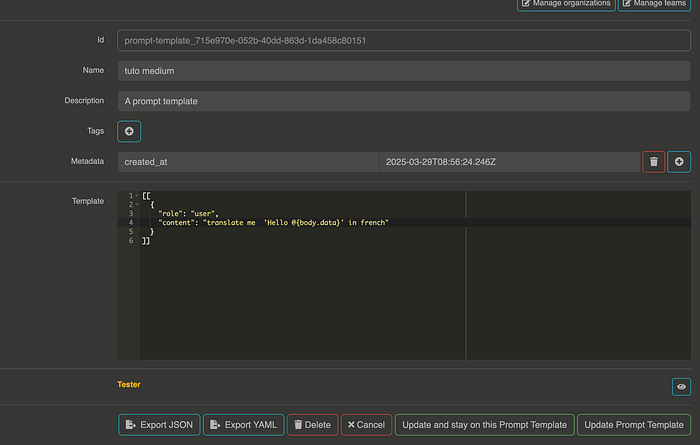
As with the context, you can try out your prompt by choosing your provider and testing it.
Defining Your Route and Connecting All Components
We’re getting close to the end. Now we need to create a route that links the provider, the context, and the prompt templates.
Click on Routes, then click on Create new routes. Set up the name of your route, link it to each group, and click on Create route again.
Before proceeding with the route configuration, let’s take a moment to understand the interface. In the blue section, you can find all the components related to AI and LLM functionality. The green part shows the request lifecycle: your request arrives at your endpoint, passes through the left section, calls your LLM provider, and returns in the response. You can add different actions in both sections.
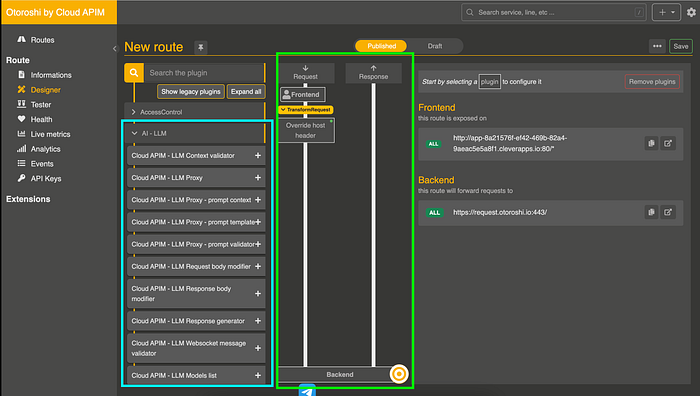
Now, we need to:
- Set up the provider
- Add the Prompt template
- Define your endpoint
Provider Configuration
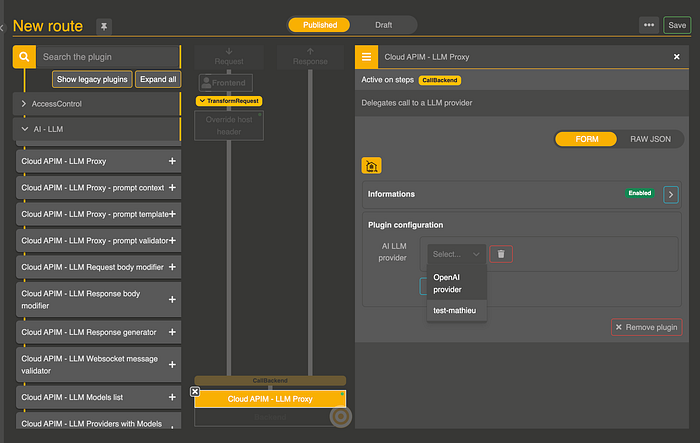
In the blue section, search for “LLM Proxy” and click on the +. At the bottom, you'll find a new section in yellow called Cloud APIM LLM Proxy. This contains all your provider configuration, which you can select in the right panel.
Prompt Template Configuration
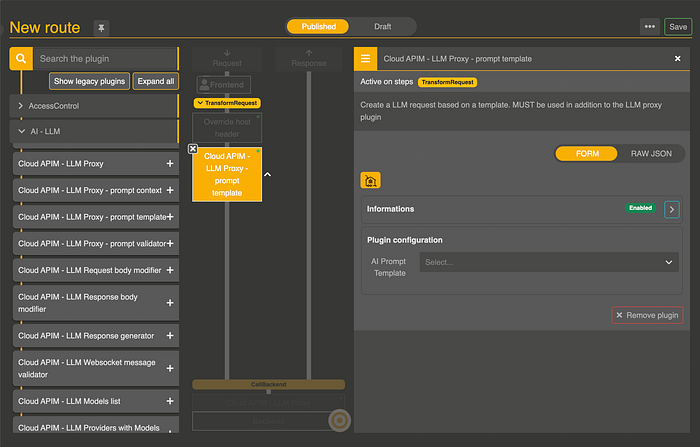
In the blue section, click on prompt context and click on the +. In the request workflow, you'll see a new section called Cloud APIM LLM Prompt template. In the right panel, select the prompt template you want to use.
URL Definition
Finally, click on “frontend” and update your domains. For example, my route will be exposed at /medium-article. And that's it!

Congratulations! Your route is now defined and ready to use. Save it now. Note that your route is not currently protected; in a future article, I’ll show you how to add API key requirements to secure your endpoint.
Testing Your Configuration
Now, you can use your endpoint in your application. For this example, I’ll use curl:
curl -X POST 'https://YOUR_URL.cleverapps.io/medium-article' \
     -H 'Content-Type: application/json' \
     -d '{
         "data": "INVYO"
     }'

#result
{
   "generations":[
      {
         "message":{
            "role":"assistant",
            "content":"\"Hello INVYO\" in French is \"Bonjour INVYO\"."
         }
      }
   ],
   "metadata":{
      "rate_limit":{
         "requests_limit":5000,
         "requests_remaining":4999,
         "tokens_limit":2000000,
         "tokens_remaining":1999988
      },
      "usage":{
         "prompt_tokens":16,
         "generation_tokens":14,
         "reasoning_tokens":0
      }
   }
With Otoroshi, you can track your token consumption, and if you add rate limiting, you can easily monitor your usage.
Conclusion
Otoroshi provides a powerful and flexible way to manage your LLM services. Centralizing your API keys and providing features like semantic caching, fallbacks, and guardrails significantly improves your LLM infrastructure’s resilience and efficiency. In the following article, we’ll explore how to secure your endpoints and dive deeper into Otoroshi’s advanced features.